Locomotion Technique Implementation
Mar. 6, 2021This post will mainly cover how I went from my intial idea pitch (read more in my Locomotion Technique Pitch post) to the implementation of the technique.
As you may know, scripts are implemented in C# in Unity. The post will then contain snippets of C# code followed by an explanation of why I made the choices I made regarding the method of implementation.
The full code is available on: https://github.com/hadi-el-hajj/SupermanLocomotionTechnique
Let’s start !
Code
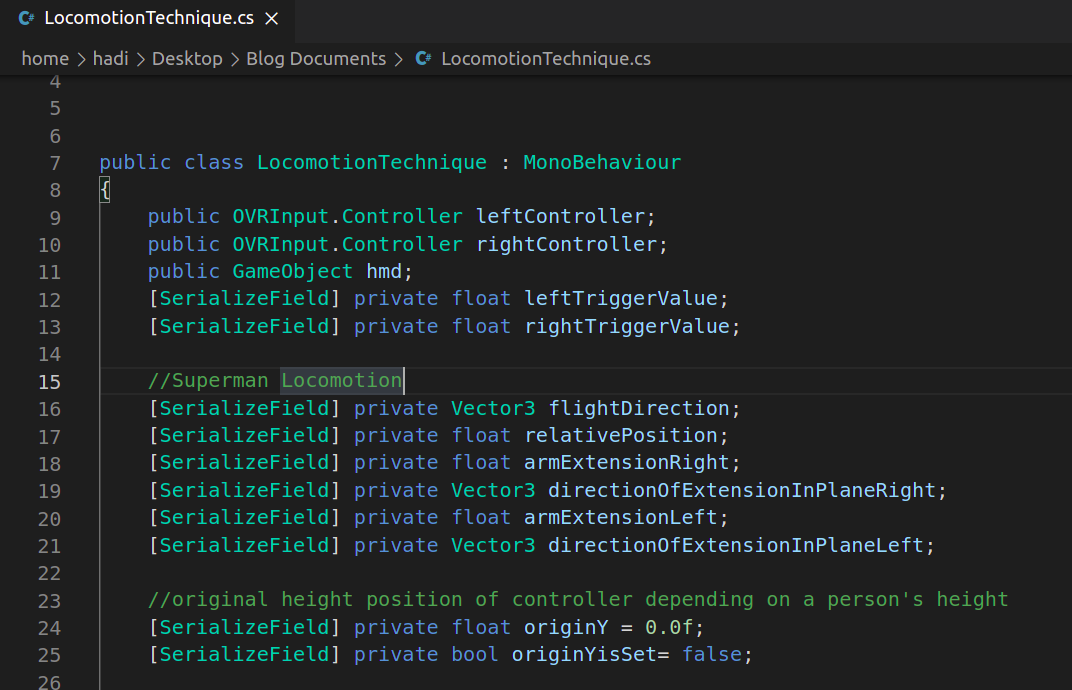
First, let’s start with explaining the variables used in the code.
Lines 9-13 declare variables referring to the actual hardware used, i.e. the two controllers, the triggers on these controllers as well as the head-mounted-display, or hmd.
Lines 15-25 depict, on the other side, variables used in the locomotion technique to calculate the position of the player and the impact his movements have in the game world.
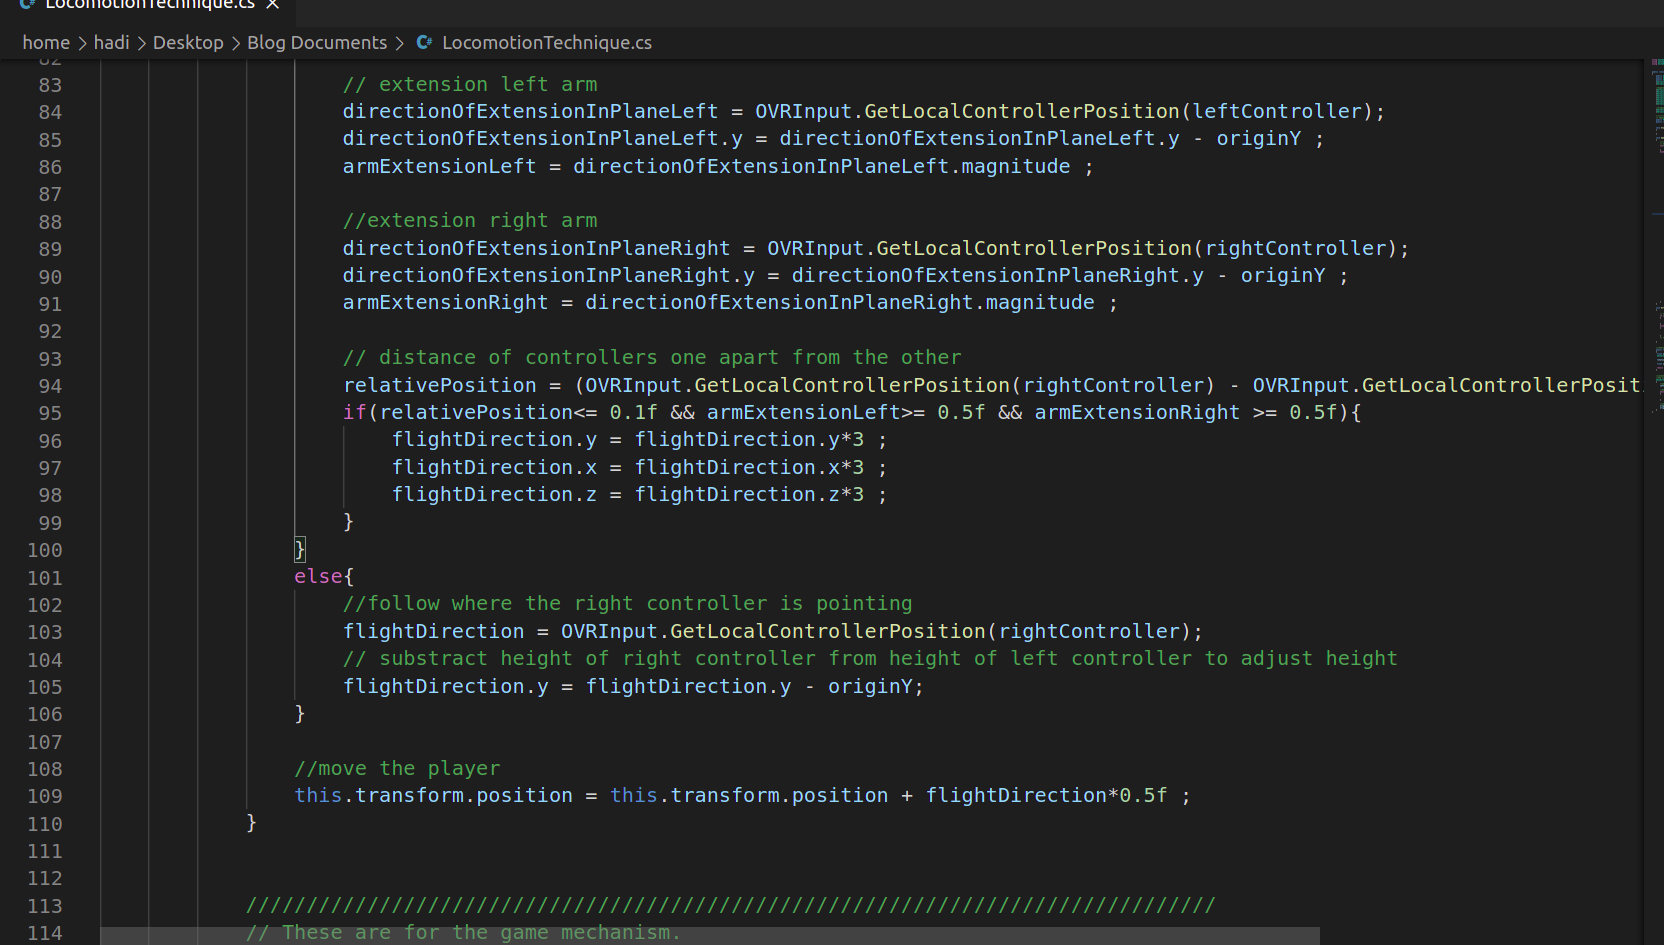
In these means, flightDirection is a vector directed towards the current direction of movement of the player. This is the variable that gets updated when the player tries to move in another direction.
relativePosition is a float used to calculate the distance between the player’s controllers positions. It will be mainly used to find out if the player is trying to accelerate (boost) or not.
directionOfExtensionInPlaneRight is simply a vector describing the direction in which the right arm is extended, and armExtensionRight is the amplitude of this vector. Same goes for variables ending with Left, for the Left arm.
Following these variables, you can see a defined float, originY, which will contain the initial height set by the player in the game, while the bool originYisSet will be used to check whether originY has been set or not.
Now let’s see how these are used in the code to program the movements of the player.
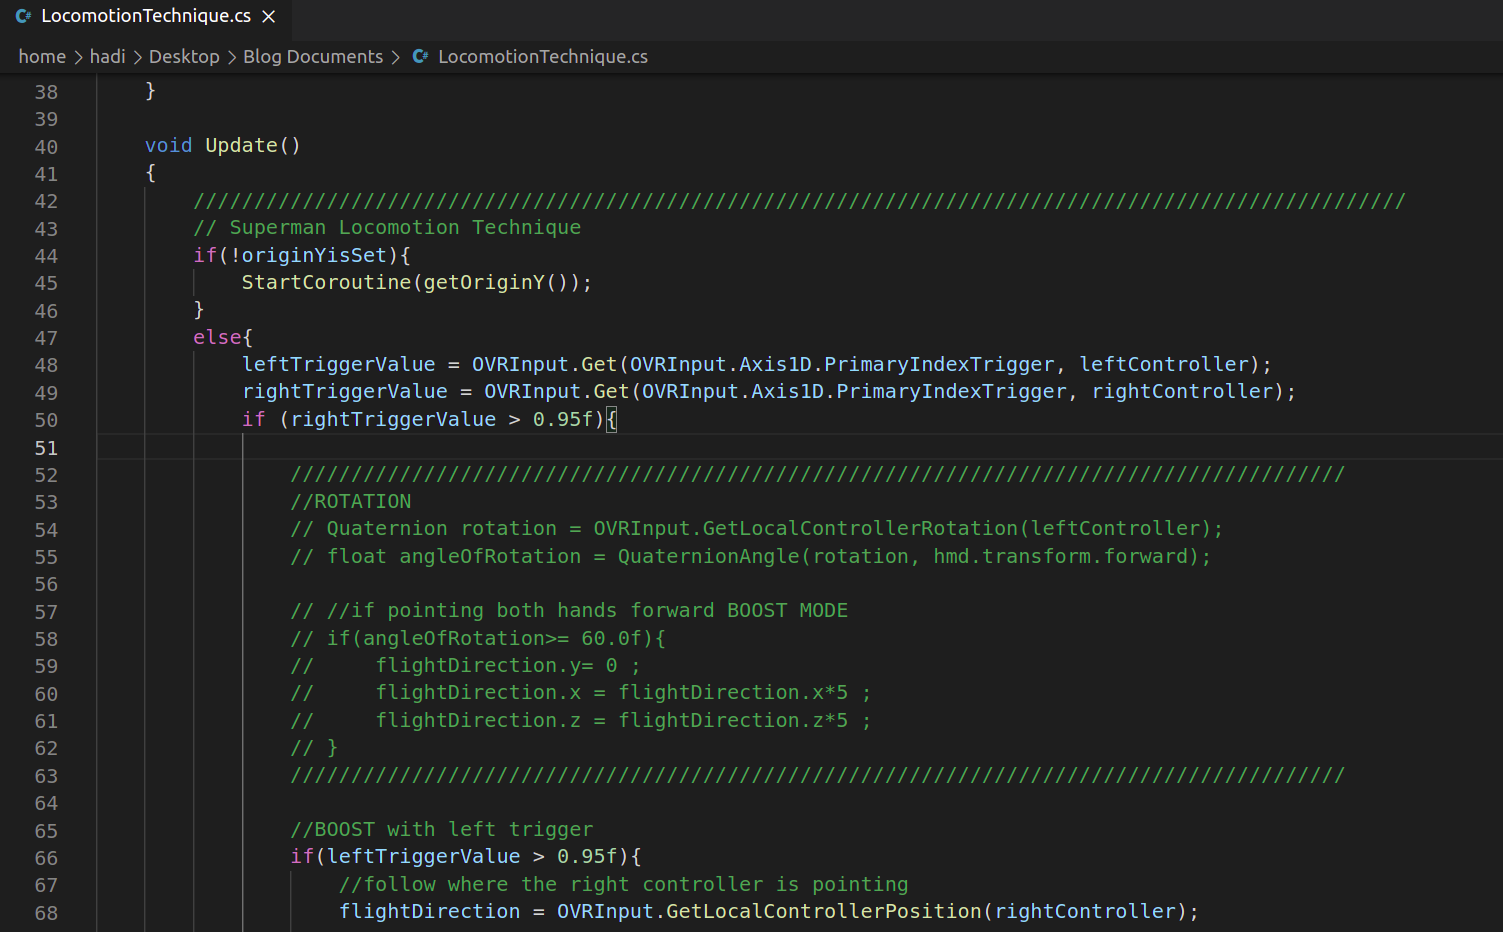
THe update function is the maim function used in the Unity environment to update the state of the game.
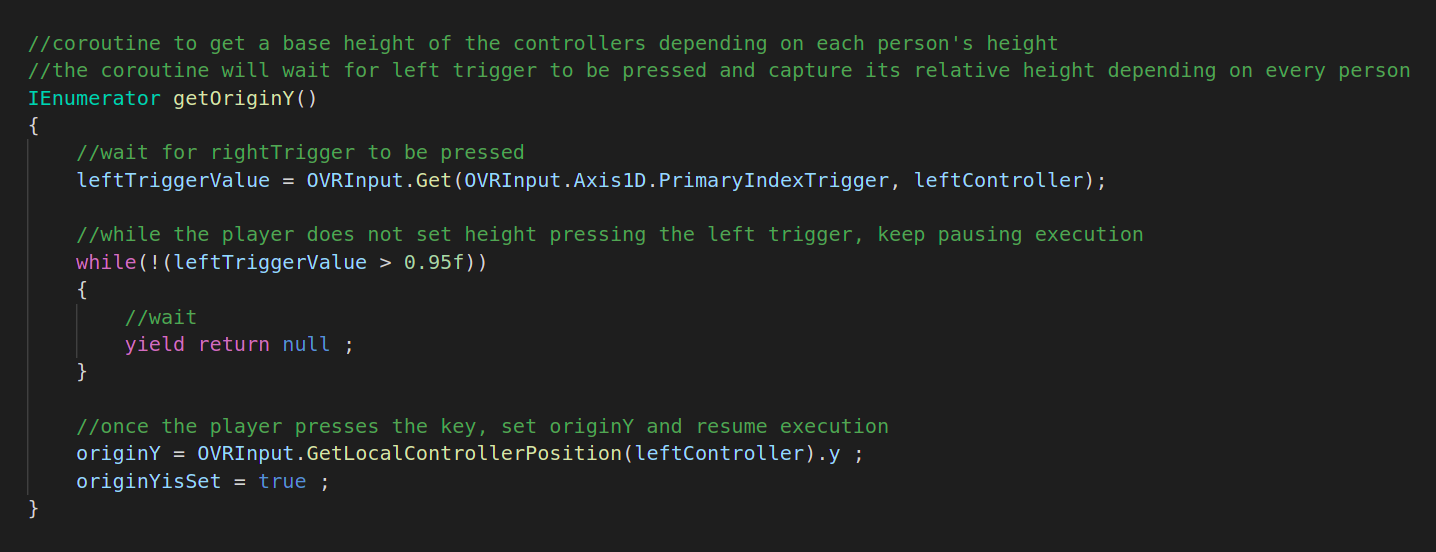
First, you see an if statement, which verifies if the initial height has been set or not. if it is not set, we start the coroutine getOriginY, but if it is, we go straight to the else statement.
The choice of using a coroutine was made after looking online for known solutions that would allow me to block the simulation (update method) until a variable is set. At first, I tried wit a mere while loop, but the scene would not be shown unless the user pressed the button (black screen was shown instead), which was a little bit offsetting for the user. After some research, I came along this post: https://answers.unity.com/questions/812117/how-can-i-have-a-function-pause-until-a-variable-r.html which helped ! I found the method elegant and used it for my implementation (see figure below)
Let’s go back to the update function. In my implementation, the choice of button actions is as follows:
- Right trigger unlocks movement
- Left trigger unlocks boost
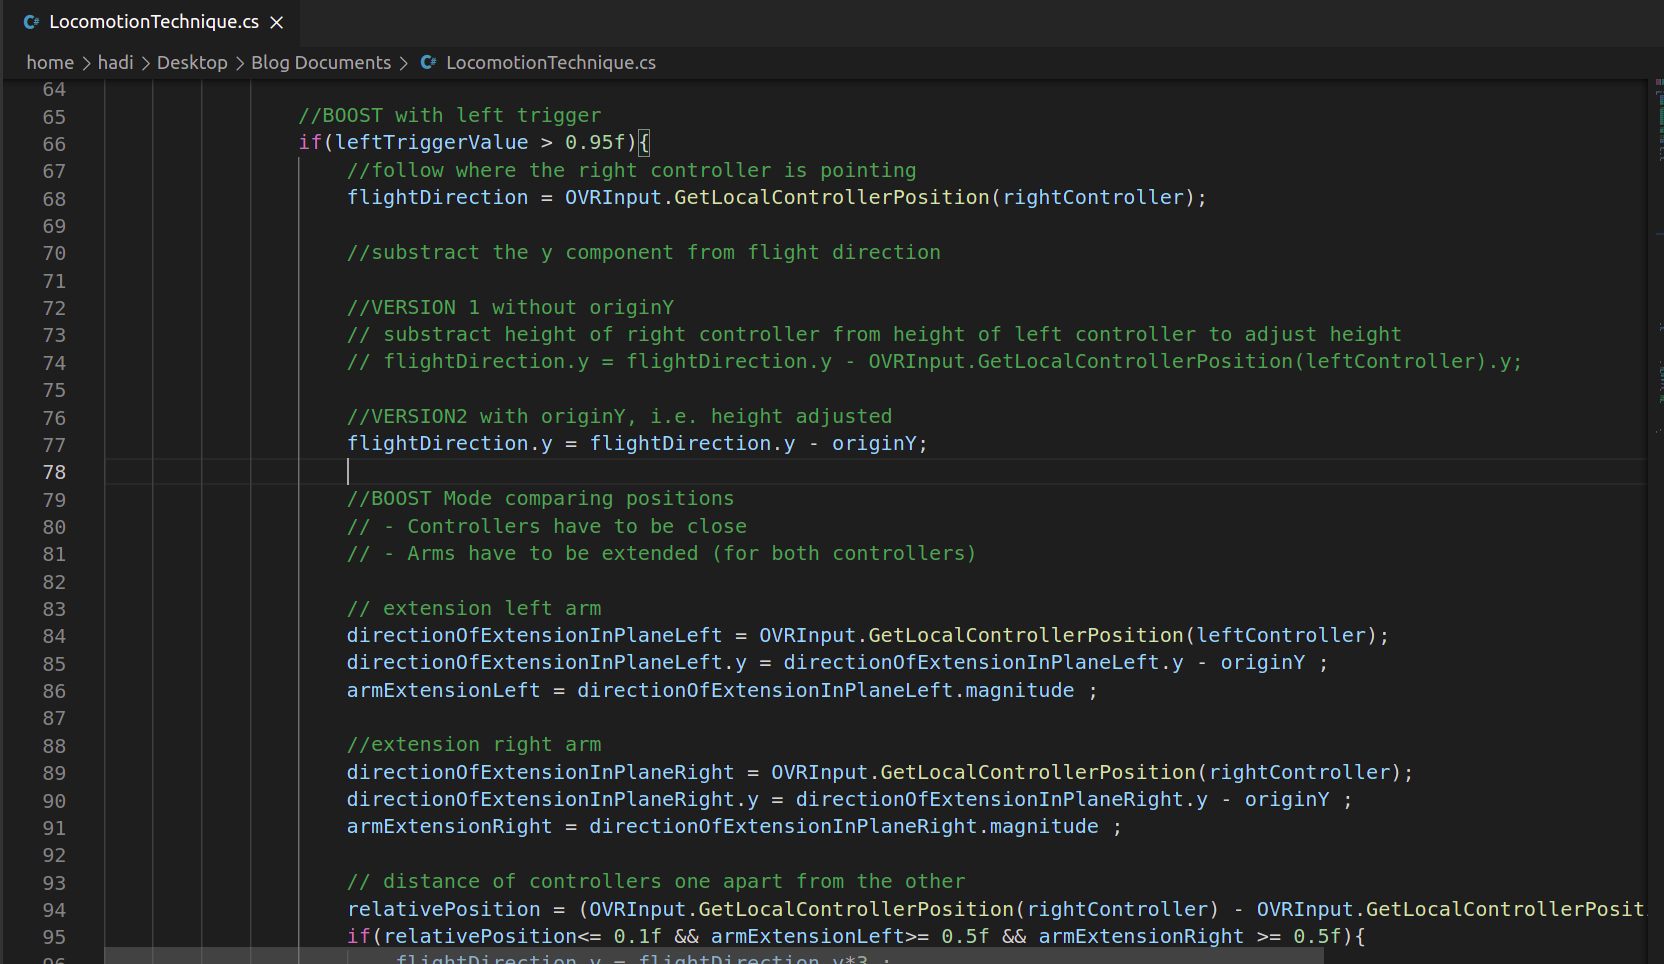
This means that checking the trigger values is very important, which is done in the two lines just after the else statement. The code that follows is very simple to understand: conditionally, depending on the values of the triggers, we enter movement mode, and if left trigger is pushed additionally to the right trigger, boost can be toggled if some conditions are met (close hands and extended arms). The two figures below complete the code in the update function.
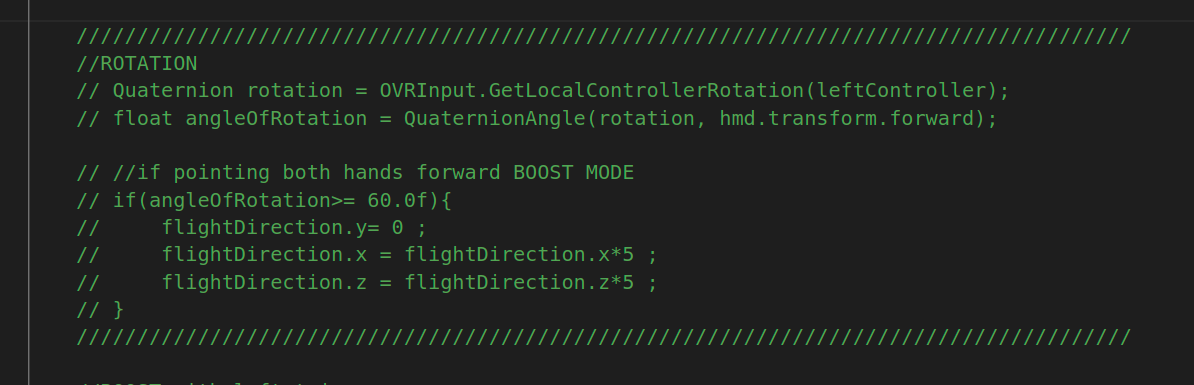
You may have realized the presence of a big commented block titled ROTATION, which is a method I implemented, but abandoned. I will discuss this method at the end of this post in the section Rotation.
Rotation
The main idea behind this method was to check for a wrist twist from the user to activate boost mode, which was way more complex than what I implemented at last.
First, let me import the code for you.
 To start, I get the rotation of the controller, which is given by the Oculus package as a Quaternion.
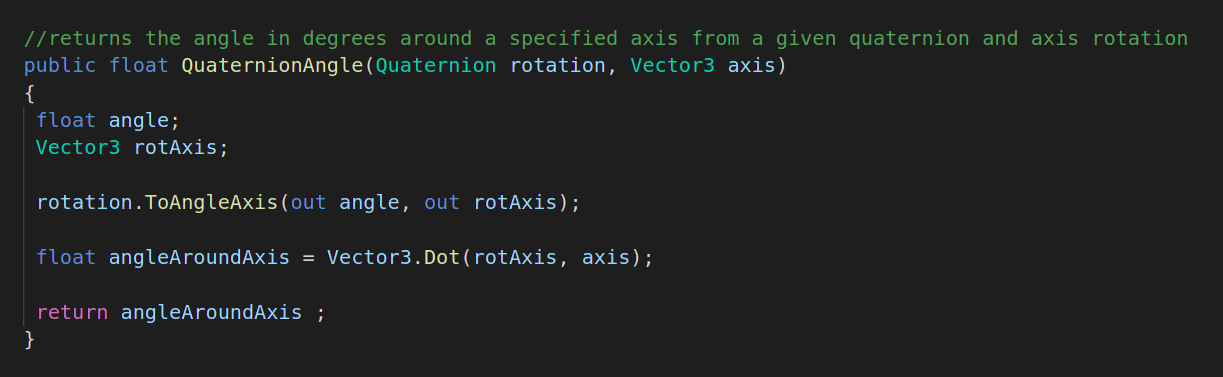
Afterwards, I pass the quaternion found to a QuaternionAngle function which main goal is to take a quaternion and a given axis, and give the rotation this quaternion implies, in degrees, on the axis, which is much more intuitive.
If you look closely, you can see that I pass the hmd.transform.forward vector to the function, which is the direction in which the user is looking through the hmd.
To start, I get the rotation of the controller, which is given by the Oculus package as a Quaternion.
Afterwards, I pass the quaternion found to a QuaternionAngle function which main goal is to take a quaternion and a given axis, and give the rotation this quaternion implies, in degrees, on the axis, which is much more intuitive.
If you look closely, you can see that I pass the hmd.transform.forward vector to the function, which is the direction in which the user is looking through the hmd.
The code of this function is given below, which was inspired by a post on StackOverflow:
Finally, depending on a threshhold I chose, I would boost the player if the angle of rotation is larger than the threshhold.
As you can see, the method is quite complicated and depends upon a lot of variables. Most importantly, for this method to work correctly, the direction to which the controller is pointing and the hmd forward vector should be parallel, which is hardly true when the player is playing. This is why I quickly transitioned to another method of implementation, even though this one was very interesting to test.